Composite & Challenging Coatings Inspection

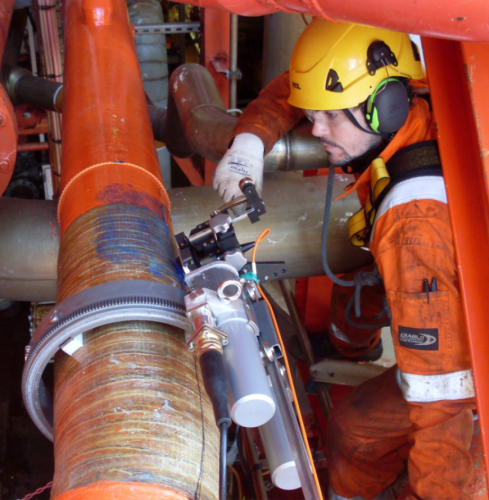
Inspection of the steel under a composite repair allows an estimation of the corrosion growth rate. Understanding the condition of the composite repairs and underlying steel means that the risk of ongoing operation is effectively managed, the cost of replacement can be deferred or avoided and production is maintained – a shutdown is not needed.

Interested in a Composite Coatings Inspection? Get in touch with the Sonomatic team today to find out more.

Dynamic Response Spectroscopy (DRS)

Inspection of steel through coatings such as composite repairs, corrosion protection tapes and subsea insulation, is not possible with standard ultrasonic inspection methods.

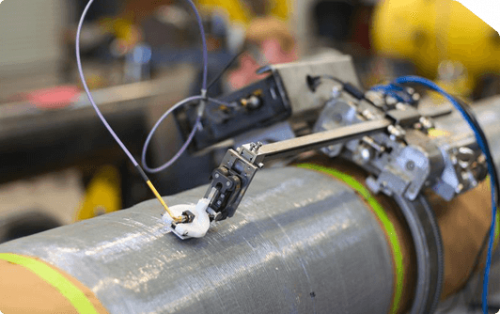
In many situations, other inspection techniques such as Pulsed Eddy Current and Radiography cannot achieve the necessary sensitivity or measurement accuracy. To address this requirement, Sonomatic developed Dynamic Response Spectroscopy (DRS); an innovative ultrasonic inspection technique for mapping corrosion through challenging coatings. Low-frequency ultrasound (<1 MHz) penetrates the coating and excites the steel, causing it to vibrate at its natural frequencies.

Using advanced signal processing algorithms, these frequencies are extracted and used to determine the steel wall thickness profile. The thickness measurement accuracy is typically ±0.5 mm.

The DRS technique is also used to evaluate the integrity of coatings, specifically composite repairs. Flaws such as disbondment contain small air pockets which block transmission of the ultrasound into the steel. DRS detects these flaws where the steel response signal is lost. Flaw acceptance criteria and QA test software have been developed by Sonomatic based on Finite Element models.

KEY ADVANTAGES OF DRS INCLUDE:
  • Locating composite repair flaws such as delaminations, wrinkles, contamination.
  • Input to Sonomatic QA test software to assess repair integrity.
  • Confirming the absence of steel degradation.
  • Estimating corrosion growth rates.
  • Quantifying the extent of steel wall loss.
  • Determining if corrosion growth is active.
  • Input to Fitness for Service assessment, including Level 3 using Finite Element Analysis.
  • Find out more information on DRS here.

Magnetic Eddy Current (MEC™)

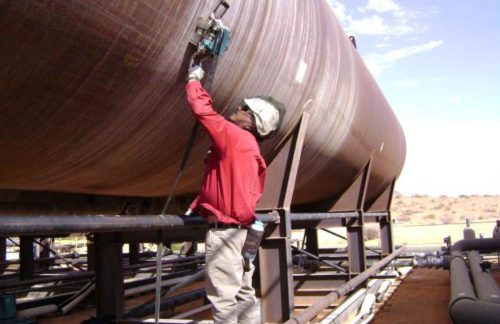
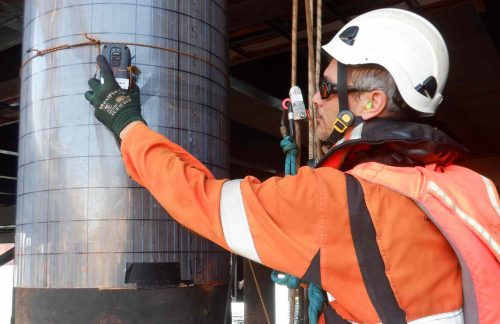
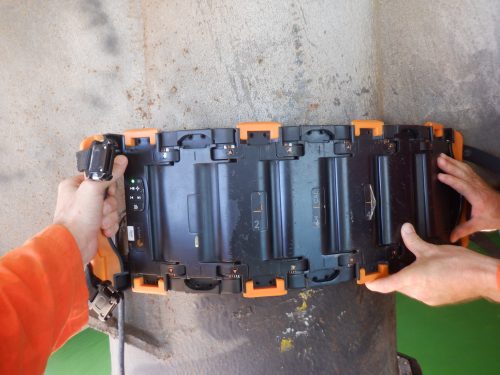
The next generation MEC™ technique is a fast and reliable method for the detection of corrosion and defects in pipes, pressure vessels, and drums. Applied during the process conditions, the MEC™ technique ideally supports the Non-Intrusive Inspection (NII) strategy.

MEC™ (Magnetic Eddy Current) is the next generation and a further development of the industry proven fast corrosion screening SLOFEC™ technique.

PIPE & PRESSURE VESSEL CAPABILITIES USING MEC™:
  • High defect detection sensitivity in pipes with OD 1” to 56”, WT up to 30mm, coating up to 15mm and pressure vessels with WT up to 30mm, coating up to 5mm.
  • Ability to detect internal and external corrosion and defects including isolated pits of very small diameter and volume.
  • No coating removal and minimal surface preparation prior to inspection.
  • Ability to inspect horizontal and vertical pipes and pressure vessels of different steel materials (carbon and stainless steel, duplex, super duplex) and coating types (GRP, rubber, paint).
  • Direct sizing of defects during scanning without the need for Ultrasonic verification.
  • Defect assessment, integrity and monitoring support.
BENEFITS:
  • High sensitivity and reliability in detecting topside and underside / internal and external defects including small and shallow pitting caused by bacterial corrosion (from Ø >3mm and 10% wall loss).
  • Direct sizing of defects during scanning without the need for Ultrasonic verification with accuracy of +/- 10% for onsite reporting and +/- 5% for special offline analysis.
  • No coating removal for a faster and more economical inspection operation.
  • Ability to inspect through higher wall and coating thickness.
  • Analysis of defect severity in terms of volume and wall loss.
  • Differentiation of defects from non-defects such as inclusions and laminations.
  • Enables fast and efficient scanning and C-scan mapping of large areas.
  • Low cleaning requirement prior to inspection.
  • Ability to inspect under various temperatures.

Pulsed Eddy Current (PEC)

Pulsed Eddy Current (PEC) is a comparative technique whereby advanced processing of the eddy current signal decay and comparison with a reference signal, allows for the determination of the average wall thickness (AWT). This fast screening method allows for the assessment of the general condition of structural steel and is best suited for general corrosion type defects in pipelines.

Sonomatic uses the Lyft Pulsed Eddy Current Array (PECA), a probe that utilises 6 units operating in tandem. Covering a 457mm wide strip, this unit greatly increases productivity and reduces set-up time.

BENEFIT OF PEC INCLUDES ITS ABILITY TO INSPECT THROUGH:
  • Concrete weight coating
  • Challenging Coatings
  • Marine Growth
  • Insulation
  • Corrosion Product
  • Fireproofing

Microwave

Sonomatic has developed a technique that can be used to inspect the outer sheath and surface or the metal armour bands of flexible pipes, plastics and composites. The technique uses low-power microwaves, which can penetrate semi-conducting materials where other NDT inspections i.e. Ultrasonic or Eddy Current inspections, are ineffective.

The microwaves used in our inspections are completely safe and are no more powerful than those sent and received during a mobile phone call. The technique uses hundreds of frequency points over a wide bandwidth, this maximises the probability of detection. It also allows us to determine the depthwise position and through-thickness extent of defects.

Microwave scanning can detect:
  • Displacement of armour bands.
  • Damage to outer armour bands.
  • Damage to the polymer jacket.
  • Near-surface defects.
  • Far-surface defects.
  • Voids

Frequently Asked Questions

DRS is a technique developed by Sonomatic to inspect coated steel where other methods are ineffective. It uses specialised ultrasonic probes and advanced data analysis algorithms to measure the steel thickness. Instead of detecting ultrasonic reflections (like standard inspection methods), DRS makes the steel vibrate and listens for its frequencies to determine the thickness profile.

DRS is also widely used to inspect the quality of composite repairs by checking for trapped air bubbles and delaminations which stop the ultrasound penetrating the coating altogether.

The typical accuracy of DRS thickness measurements is ±0.5 mm. DRS maps are suitable for input to Fitness For Service assessment, particularly Level 3 assessments using Finite Element Analysis. They are also used for statistical analysis of limited coverage inspections, quantifying the extent of steel wall loss and determining if corrosion growth is active, along with estimating growth rates.

Sonomatic recommend DRS inspection when composite repairs are installed, so flaws in the composite can be detected immediately and rectified if they are detrimental to the integrity of the repair.

Flaws such as delaminations are common in some composite repairs but they are not necessarily detrimental to the integrity. Sonomatic has developed QA Test software to perform an integrity assessment, based on the design requirements of the repair, on the composite flaws found by the DRS inspection.

DRS has been optimised for inspection through a range of coatings, including but not limited to: Composite Repairs, Intumescent Passive Fire Protection (PFP), Corrosion Protection Tapes (CPT), Polychloroprene (PCP) e.g. Neoprene®, Coal Tar Enamel and Coal Tar Epoxy, Multi-layer Polypropylene, Injection Moulded Polypropylene (IMPP), Glass Syntactic Polyurethane (GSPU), and Polypropylene (PP) and Polyethylene (PE) Shrink Wraps.

DRS is deployed on a range of field proven tools such as:

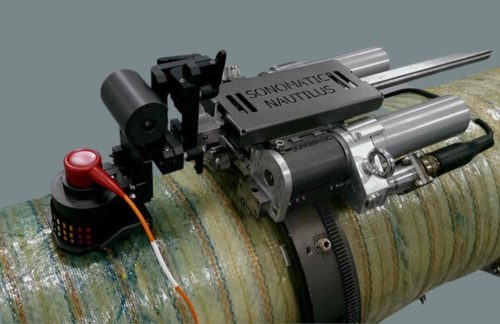
Nautilus - Topside and subsea inspection system: diver deployed subsea on pipe diameters from 5" up to flat.

Stingray Scanner - Topside and subsea inspection system

Internal Caisson Tool (ICT): inspection of wet and dry regions.

ROV-iT - Subsea inspection system: ROV deployed horizontally or vertically on pipeline diameters from 6" to 30" at depths to 2000 m (6500 ft).

Get in touch with us today