Corrosion Under Pipe Support (CUPS) Inspection

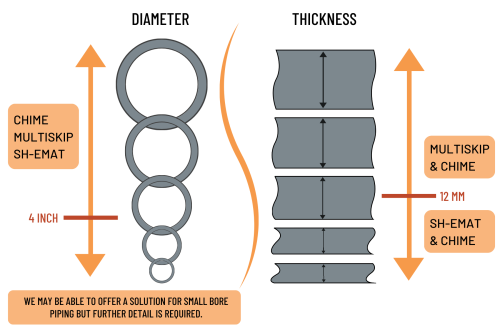
Sonomatic’s Specialist Field Services employs three ultrasonic pipe support techniques for CUPS inspection, selecting the appropriate technique based on factors such as material thickness and component diameter. Precise measurement of remaining wall thickness can be challenging when employing medium-range techniques, especially in cases where there is complex corrosion morphology.

Field conditions often impose limitations associated with boundary conditions. Highly sensitive CUPS inspections can justify avoiding the need to lift pipes for visual inspection when compliance with design codes is required. Unfortunately, CUPS inspections are usually requested after corrosion has already advanced, which can exacerbate the interface between the pipe and support, leading to various corrosion-related issues.

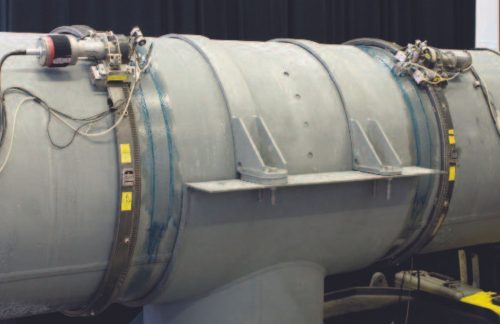
It’s crucial to ensure that CUPS inspection techniques are appropriately validated to avoid a false sense of security.

Sonomatic focus on qualitative approaches for CUPS inspections. Inspection variables are optimised in order to provide reliable and repeatable results. With the growing market for CUPS inspection, it’s essential that relevant validation exists for any techniques that are deployed. Sonomatic emphasises the importance of maintaining a critical perspective on the effectiveness of inspection methods.

Contact Us Today

MULTISKIP

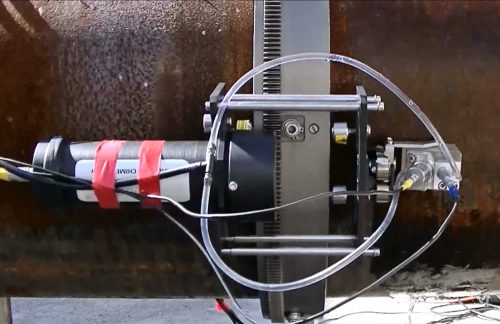
The Multiskip technique addresses the challenge of assessing inaccessible areas prone to corrosion, like pipe and vessel supports, without the need for costly equipment lifting. It is effective for detecting both internal and external corrosion damage and estimating corrosion depth. Additionally, it serves as a rapid screening tool for identifying internal corrosion in pipelines, with anomalies further evaluated through corrosion mapping.

Using angled shear waves and two transducers in a pitch-catch mode, Multiskip allows for up to 2 meters of separation between the transmitter and receiver,

providing comprehensive material condition assessment. It operates at high scanning speeds, facilitating rapid coverage of large areas. The technique utilises ultrasound that ‘skips’ through the material, and any degradation along the path affects signal arrival times, with these characteristics visible in the collected b-scans, enabling clear identification of degradation presence.

Multiskip has been validated through blind trials, including the HOIS project for the inspection of corrosion under pipe supports. During the trial, Multiskip achieved a probability of detection of 1 with a zero false call rate.

THIS TECHNIQUE OFFERS THE FOLLOWING:
  • Large area, single pass corrosion detection.
  • Depth sizing capability for corrosion.
  • 100% coverage of material between the probes.
  • Sensitive to both internal and external surface degradation.
  • Suitable for steel pipes and plate.
  • Probe separation up to 2m.
  • Ability to inspect material thickness between 12mm and 100mm.
  • Can be deployed in both manual and automated inspection set-ups.
  • Rapid screening inspection of both topside and subsea pipelines.

CHIME

The challenge for owners and operators is to prolong equipment life and detect corrosion early, particularly in large areas like production vessels and long pipelines where conventional ultrasonic methods can be time-consuming and expensive. The CHIME technique offers an efficient solution by enabling large area, single-pass screening without the need for costly shutdowns. It can be applied to various structures, eliminating the need for dismantling and allowing for the inspection of inaccessible areas.

CHIME serves as a valuable initial screening tool, offering a percentage wall loss value to pinpoint areas of corrosion. Developed within the HOIS joint industry project,

CHIME has proven successful in various applications, making it an effective choice for rapid, large-area corrosion screening. This technique combines different ultrasonic waves and uses advanced signal processing for data interpretation, making it suitable for ultrasonic inspection of certain pressure equipment and a complement to methods like Multiskip or SH-EMAT in the inspection process.

CHIME has been validated through blind trials, including the HOIS project for the inspection of corrosion under pipe supports. During the trial, CHIME achieved a probability of detection of 1 with a zero false call rate.

THIS TECHNIQUE OFFERS THE FOLLOWING:
  • Suitable for plate between 5mm and 80mm.
  • Offers high probability of detection for defects with >10% wall loss.
  • Rapid coverage - probe separation is 300mm to 1000mm typically.
  • Requires reasonable surface for ultrasonic coupling.
  • Suitable for inspection of inaccessible areas, e.g. under saddle supports or under pipe supports.
  • Some heavy coatings can attenuate ultrasound.
  • Detection capability of narrow pits can be limited.
  • Sizing capability in depth categories.

SH-EMAT

Sonomatic have developed an electromagnetic acoustic transducer (EMAT) system that uses horizontally polarised shear (SH) waves to inspect thinner-walled pipes. This applies to inspection at pipe supports and also for rapid screening of piping for detection of corrosion. The system is compact, battery-powered and does not require couplant, making it extremely portable.

Due to its design, the system can easily be deployed using rope access. The technique has been validated through blind trials and has proven its capability on-site at various

locations around the world. Inspection under pipe supports is a major application for this technique as it allows the condition of the material to be reliably assessed, without the need for lifting the pipe from the support.

SH-EMAT has been validated through blind trials, including the HOIS project for the inspection of corrosion under pipe supports. During the trial, SH-EMAT achieved 100% detection with 0 false calls.

THIS TECHNIQUE OFFERS THE FOLLOWING:
  • Non-contact inspection.
  • No couplant required.
  • Suitable for wall thicknesses between 3mm and 15mm.
  • Sensitive to internal and external degradation.
  • Screening approach to identify areas of degradation rapidly.
  • Inspection through coatings up to 1mm thick.
  • Encoded measurements.
  • Ultrasound generated within metal.
  • Utilises shear horizontally polarised guided waves.

INSPECTION PLAN

The thickness assessed during a Multipskip inspection is generally conservative; however, there are instances where the remaining wall thickness may be underestimated. Consequently, employing a combination of CHIME, SH-EMAT, and Multiskip increases the probability of detection significantly compared to relying on a single technique. It is advisable to simultaneously utilise two techniques whenever feasible, as this not only enhances the reliability of the inspection but also enables more accurate depth measurements.

Get in touch with us today