About Subsea Inspection

Sonomatic Subsea is a leading provider of ROV and Diver Deployed robotic technologies capable of advanced subsea inspections. With over 30 years of experience in this field, and the ability to adapt existing technologies to suit specific client requirements, Sonomatic subsea are industry leaders in the field of subsea advance inspections.

Sonomatic brought innovation to the Oil and Gas market by introducing Time of Flight Diffraction (TOFD) in the 1980s and has continued to bring world-leading technology to our clients. We are unique amongst other inspection service providers, in that we design/develop, and build our own inspection systems and scanners that can and have been modified over time to meet specific requirements for inspection performance, deployment and in-field reliability.

Sonomatic is committed to providing accurate, proactive inspection solutions that enable clients to manage the integrity of maturing assets, while making informed and cost-effective decisions crucial to the extension and safety of plant life. We pride ourselves on our proven track record in the management and safe delivery of inspection services for subsea operations.

With the support of our internal integrity division, we can assist operators by providing not only the field data but a range of integrity services, including innovative statistical analysis methods that ensure decision-making is aligned to the real conditions of subsea assets.

Contact Us Today

Diver Deployed Inspection Solutions

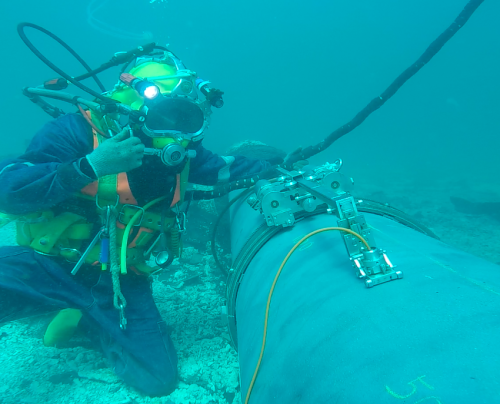
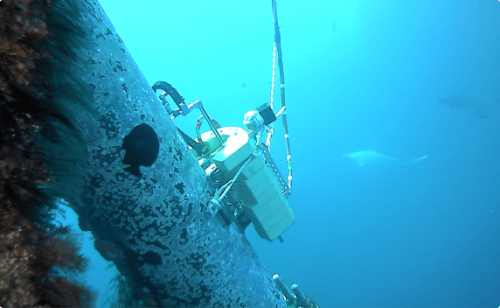
A Sonomatic diver deploying Sonomatic's Nautilus machinery

When scopes require a high level of dexterity and may need on-site adaptability, Sonomatic can utilise divers in a wide array of subsea and splash zone NDT inspections.

Work-Class ROV Solutions

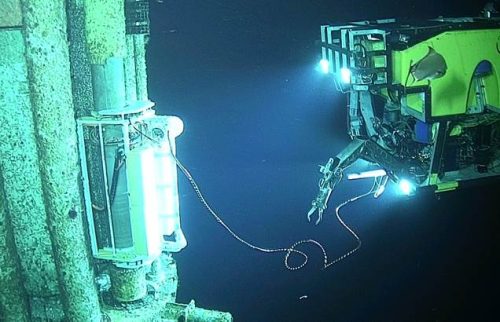
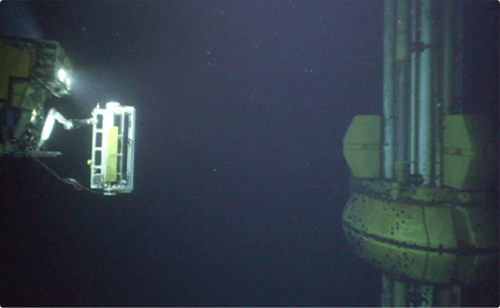
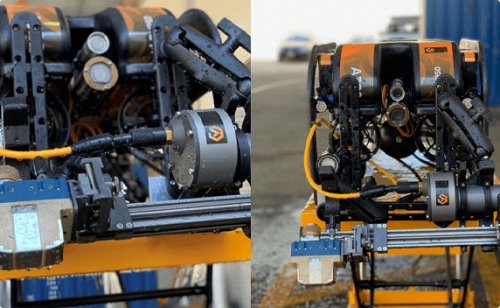
An image of a Sonomatic Subsea ROV performing a subsea inspection

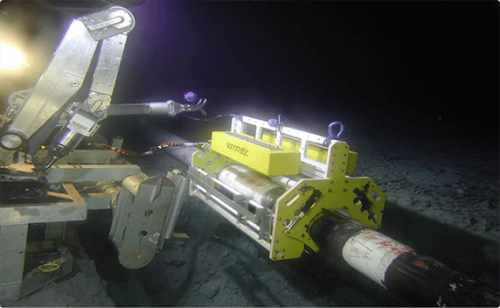
Work-Class ROVs overcome many of the key issues presented when using divers (issues with depth, high cost, risk factor, etc.). Sonomatic has developed a range of ROV tools specifically designed to inspect pipelines, risers, caissons, and structural assets. Many of these tools are adaptable and can operate both horizontally and vertically. Our tools can be used in a range of services including:

  • Verification of ILI tool findings
  • Inspection for internal corrosion and erosion
  • Inspection for preferential weld corrosion/erosion
  • Inspection for fatigue cracking (TOFD)
  • Inspection for wet H2S damage in sour service
  • Inspection for chloride pitting/SCC in corrosion resistant alloys
  • Inspection of subsea fabrication and repair welds
  • Component geometry measurement including ovality inspection

Mini-ROV Inspection Solutions

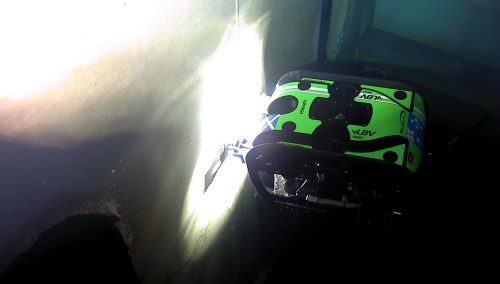
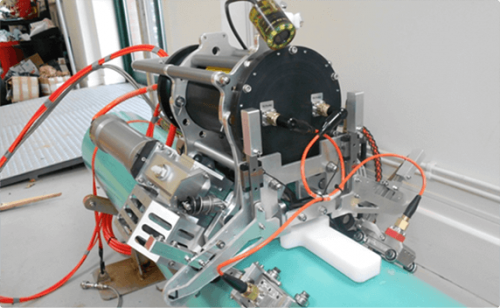
One of Sonomatic's Mini Subsea ROVs performing a subsea inspection

Mini-ROVs provide clients with a reliable, safe and cost-effective alternative to divers or work-class ROVs. The size and weight of Mini-ROVs make them ideal for jobs that require rapid mobilisation or where access is an issue. The deployment method can also be tailored to each situation, with the Mini-ROVs having the ability to be fitted with front-facing NDT attachments or deploy heavier tools in a payload capacity.

BENEFITS OF SUBSEA ROV ADVANCED INSPECTION

If your project includes the inspection of subsea structures, then there are many reasons to consider an ROV advanced inspection. The benefits of such inspection approaches include, but are not limited to:

Cost-effective

Subsea inspections can sometimes seem like a costly venture, needing a team operating manned underwater vehicles to perform such duties. Subsea ROV Advanced inspections come in handy in this situation as they are significantly more cost effective and can be operated below the water for longer periods of time. This in turn makes inspection available at a low cost, saving money across the entire project.

Value of Data

Operating inspections on a project should be efficient and save time that can be used in other areas. Subsea ROV Advanced Inspection encodes all inspections with high precision data and good repeatability; this makes all inspections as efficient with the highest value possible.

Better Safety

Safety is an integral part of any project – big or small, above or below water. Since Subsea ROV inspections can be performed by operators above ground, the risk to workers is significantly reduced. Such high levels of safety are highly sought after, making these inspections a great choice.

Frequently Asked Questions

Automated corrosion mapping involves scanning the pipeline to determine the minimum remaining wall thickness for each position and can be achieved using an advanced automated ultrasonic tool. The systems deployed, produces comprehensive high-quality data that can be displayed in different views to easily identify and/or verify any areas of concern. Sonomatic Inspection Management Software (SIMS) is used to generate 2D and 3D thickness map composites to improve efficiency in data management during the collection phase, and assists in semi-autonomous data analysis and reporting.

Time of Flight Diffraction (TOFD) is a method of accurately sizing and monitoring the through-wall height of in-service flaws. It is effective for weld inspection flaw detection irrespective of the flaw type or orientation. TOFD doesn't rely on the reflectivity of the flaw but uses diffracted sound initiating from the flaw tips. TOFD's main advantage is that it has a through wall height accuracy of +/- 1 mm, and a crack growth monitoring capability of +/- 0.3 mm, on defects of all orientations.

Dynamic Response Spectroscopy (DRS™) is a proprietary technology developed by Sonomatic using frequency-based ultrasonic wall thickness measurements. It is a corrosion mapping technique that applies a broad range of low ultrasonic frequencies (<1 MHz) to penetrate challenging coatings such as composite repairs, PE and Neoprene, and excites the natural frequencies of vibration of the underlying steel. The DRS™ probe raster scans over an area of interest and collects response signals. Advanced signal processing algorithms have been developed to extract the vibration frequencies and map the wall thickness profile.

Pulsed Eddy Current (PEC) is a comparative technique whereby advanced processing of the eddy current signal decay and comparison with a reference signal, allows for the determination of the average wall thickness (AWT). This fast screening method allows for the assessment of the general condition of structural steel and is best suited for general corrosion type defects in subsea pipelines. A major benefit of PEC is its ability to inspect through concrete weight coating, challenging coatings and marine growth.

Angle shear wave methods are widely used in NDT and in most applications the probe is manually manipulated. There are, however, significant benefits to automating the process, both in terms of probe manipulation and data collection. The benefits include the following:

  • Consistent performance with minimised human factors effects
  • Substantially improved probability of detection (POD)
  • Improved sizing capability
  • Accurate positional control
  • Accurate position information for each scan
  • Full recording of all data for more detailed analysis
  • Reliable repeat comparisons

Automated shear wave pulse echo is used for a variety of applications, some  examples are listed below:

  • Inspection of welds to detect and size planar flaws.
  • Inspection of corrosion-resistant alloys for stress corrosion cracking.
  • Inspection of corrosion-resistant alloys for chloride pitting.
  • Inspection of materials in wet H2S service for vertical cracking elements.

EMAT technology is performed from top-of-line and has the capacity to detect internal and external corrosion on subsea pipelines with NWT <15 mm with coating thickness up to 4 mm. The technique does not require direct coupling as the input and received signals are generated by electromagnetic responses. This screening technique provides details of the lateral extent of corrosion with banding to indicate the through-wall severity level.

Multiskip is an ultrasonic rapid screening technique for corrosion and erosion detection on subsea pipelines ≥4” diameter. It uses two transducers mounted on wedges in a pitch-catch to send angled shear wave beams through the pipe wall by skipping multiple times off the ID and OD surfaces. The system is capable of high-speed, high-resolution data collection. For corrosion, loss of signal amplitude, reduction in signal arrival times, and changes to signal shape are used to provide qualitative and quantitative information.

Alternating Current Field Measurement (ACFM) is an electromagnetic technique for the detection and sizing of surface-breaking indications. It works on most metals, does not require direct contact and works through various thicknesses of coatings. ACFM can accurately detect and size linear indications both length and depth. It is also easier to use on complex geometries such as nodes and nozzles.

A phased array is a unique ultrasonic probe consisting of a group of transmitters or receivers, allowing for precise control of sound waves. When used as a transmitter, the timing of element activation creates interference that can shape and angle the beam. As a receiver, the time differences between pulse arrivals at each element provide information about the pulse source's location. Similar to how our ears work, phased arrays can pinpoint sound directions. Unlike traditional twin-crystal probes, phased arrays adjust signal phases for desired beam angles. However, their performance relies on the number, size, and spacing of elements, requiring specialised signal processing equipment. Phased arrays are widely used in radar, sonar, and medical applications but face challenges in NDT ultrasonics due to metal penetration and wave mode issues.

Ultrasonic testing utilises sound waves to detect corrosion within materials. This NDT technique utilises array transducers that pulse elements in a sequence called phasing.

Eddy Current Testing (ET) is used to measure the intensity of electrical currents in a magnetic field. Eddy current testing utilises AC current in a coil near or around a specimen, inducing circulating eddy currents in the material's surface. Flaws and material differences affect these currents, altering the coil's current via mutual induction. Flaw detection relies on measuring electrical changes in the coil, often focusing on voltage changes. Key factors influencing eddy currents include specimen conductivity, magnetic permeability (for ferromagnetic materials), coil-specimen distance, AC frequency, and dimensions. Calibration on test specimens is common, and eddy current testing is highly sensitive to flaws. Equipment ranges from basic meters to advanced computer-programmed systems, with applications including crack detection, component sorting, and metal quality control.

Get in touch with us today