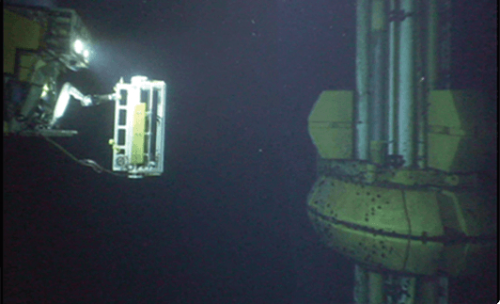
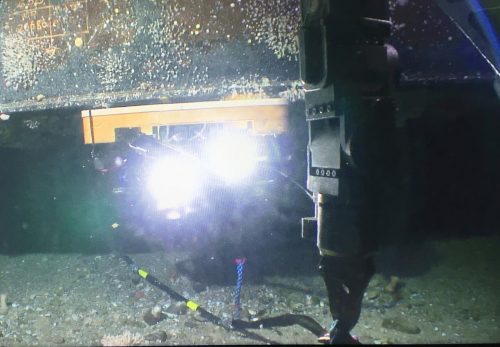
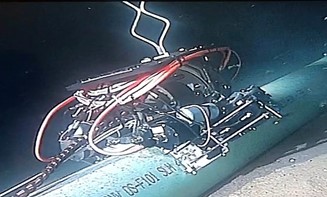
Flexible Risers.

Flexible Risers

The most common integrity issues relating to flexible risers are mechanical damage to the outer sheath or a venting system’s failure due to harsh environments in deeper water. These can lead to a pressure breach of the out sheath and flooding of the riser annulus, ultimately weakening the riser integrity through corrosion of the internal wire.

Sonomatic’s engineers are extremely familiar with these types of issues (35% of flexibles experience issues of this kind) and can help clients address these early, well before they begin drastically reducing the service life of the risers.

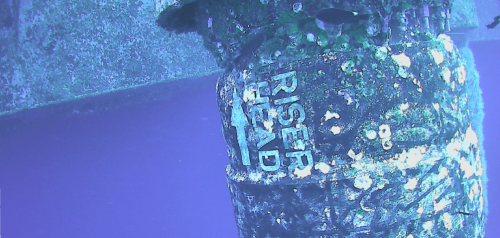
Using our proprietary ROV-iT system, the latest technology and field-proven scanners, Sonomatic’s experts can determine if an external sheath failure has occurred in the riser systems and then assist to extend the lifespan of flexible pipes, saving the client time and money.

Want flexible risers to assist in your subsea project? Contact us today to find out more.

Validated and Reliable Techniques

Sonomatic’s flexible riser inspections are designed to help your business comply with industry regulations in a reliable and validated manner. Our inspections use cutting-edge robotic technology, ensuring accuracy and precision in every inspection – whether for the annulus, internal wiring, an unbonded flexible pipe, or any other part of the riser configuration.

Our flexible riser inspections can be carried out in a variety of challenging conditions, allowing us to provide you with the most accurate and reliable results. 

Flexible riser techniques.
Sonomatic Validated Techniques:
  • Dynamic Response Spectroscopy (DRS)
  • Ultrasonics
  • InspeCT (Computerized Tomography)
Technique Solutions:

Industry Leading Technology & Comprehensive Inspection

Underwater subsea oil storage tank inspection robot.

Our flexible riser inspections are powered by industry-leading robotic technology. Our cutting-edge robotic technology ensures accurate and precise inspections, providing you with the best possible results for both onshore or offshore applications. Our robotic technology also ensures accuracy and reliability in challenging conditions, making sure that you get the most accurate and reliable results. 

Our comprehensive inspection process allows us to detect potential issues with your flexible risers in an efficient manner. Our inspection process involves a detailed visual inspection, as well as a non-destructive testing process. This ensures accuracy and reliability in every inspection, giving you the most comprehensive results possible for both low and high-pressure applications.

Benefits of Flexible Riser Inspections

Monitor Project Problems: By using Sonomatic’s Flexible Riser Inspections you can be sure that all aspects of the risers are being closely monitored for any signs of failure or degradation. This helps to reduce the risk of accidents or disasters that may arise from undetected issues or failures in the risers themselves.

Identify Risks: Our flexible riser inspection teams are experienced professionals who understand the importance of safety in this sector and provide a comprehensive service that ensures all potential risks are identified before they become an issue. 

Quick Turnaround: With our advanced detection technologies we can quickly identify problems within a riser system, allowing prompt repairs and maintenance to be completed before significant damage is caused to equipment or personnel on site. Furthermore, our techniques allow us to monitor the condition of these structures over time so that any changes can be spotted early on before they become too costly or potentially dangerous.

Frequently Asked Questions

Automated corrosion mapping involves scanning the pipeline to determine the minimum remaining wall thickness for each position and can be achieved using an advanced automated ultrasonic tool. The systems deployed, produces comprehensive high-quality data that can be displayed in different views to easily identify and/or verify any areas of concern. Sonomatic Inspection Management Software (SIMS) is used to generate 2D and 3D thickness map composites to improve efficiency in data management during the collection phase, and assists in semi-autonomous data analysis and reporting.

Time of Flight Diffraction (TOFD) is a method of accurately sizing and monitoring the through-wall height of in-service flaws. It is effective for weld inspection flaw detection irrespective of the flaw type or orientation. TOFD doesn't rely on the reflectivity of the flaw but uses diffracted sound initiating from the flaw tips. TOFD's main advantage is that it has a through wall height accuracy of +/- 1 mm, and a crack growth monitoring capability of +/- 0.3 mm, on defects of all orientations.

Dynamic Response Spectroscopy (DRS) is a proprietary technology developed by Sonomatic using frequency-based ultrasonic wall thickness measurements. It is a corrosion mapping technique that applies a broad range of low ultrasonic frequencies (<1 MHz) to penetrate challenging coatings such as composite repairs, PE and Neoprene, and excites the natural frequencies of vibration of the underlying steel. The DRS probe raster scans over an area of interest and collects response signals. Advanced signal processing algorithms have been developed to extract the vibration frequencies and map the wall thickness profile.

Pulsed Eddy Current (PEC) is a comparative technique whereby advanced processing of the eddy current signal decay and comparison with a reference signal, allows for the determination of the average wall thickness (AWT). This fast screening method allows for the assessment of the general condition of structural steel and is best suited for general corrosion type defects in subsea pipelines. A major benefit of PEC is its ability to inspect through concrete weight coating, challenging coatings and marine growth.

Angle shear wave methods are widely used in NDT and in most applications the probe is manually manipulated. There are, however, significant benefits to automating the process, both in terms of probe manipulation and data collection. The benefits include the following:

  • Consistent performance with minimised human factors effects
  • Substantially improved probability of detection (POD)
  • Improved sizing capability
  • Accurate positional control
  • Accurate position information for each scan
  • Full recording of all data for more detailed analysis
  • Reliable repeat comparisons

Automated shear wave pulse echo is used for a variety of applications, some  examples are listed below:

  • Inspection of welds to detect and size planar flaws.
  • Inspection of corrosion-resistant alloys for stress corrosion cracking.
  • Inspection of corrosion-resistant alloys for chloride pitting.
  • Inspection of materials in wet H2S service for vertical cracking elements.

EMAT technology is performed from top-of-line and has the capacity to detect internal and external corrosion on subsea pipelines with NWT <15 mm with coating thickness up to 4 mm. The technique does not require direct coupling as the input and received signals are generated by electromagnetic responses. This screening technique provides details of the lateral extent of corrosion with banding to indicate the through-wall severity level.

Multiskip is an ultrasonic rapid screening technique for corrosion and erosion detection on subsea pipelines ≥4” diameter. It uses two transducers mounted on wedges in a pitch-catch to send angled shear wave beams through the pipe wall by skipping multiple times off the ID and OD surfaces. The system is capable of high-speed, high-resolution data collection. For corrosion, loss of signal amplitude, reduction in signal arrival times, and changes to signal shape are used to provide qualitative and quantitative information.

Alternating Current Field Measurement (ACFM) is an electromagnetic technique for the detection and sizing of surface-breaking indications. It works on most metals, does not require direct contact and works through various thicknesses of coatings. ACFM can accurately detect and size linear indications both length and depth. It is also easier to use on complex geometries such as nodes and nozzles.

A phased array is a unique ultrasonic probe consisting of a group of transmitters or receivers, allowing for precise control of sound waves. When used as a transmitter, the timing of element activation creates interference that can shape and angle the beam. As a receiver, the time differences between pulse arrivals at each element provide information about the pulse source's location. Similar to how our ears work, phased arrays can pinpoint sound directions. Unlike traditional twin-crystal probes, phased arrays adjust signal phases for desired beam angles. However, their performance relies on the number, size, and spacing of elements, requiring specialised signal processing equipment. Phased arrays are widely used in radar, sonar, and medical applications but face challenges in NDT ultrasonics due to metal penetration and wave mode issues.

Ultrasonic testing utilises sound waves to detect corrosion within materials. This NDT technique utilises array transducers that pulse elements in a sequence called phasing.

Eddy Current Testing (ET) is used to measure the intensity of electrical currents in a magnetic field. Eddy current testing utilises AC current in a coil near or around a specimen, inducing circulating eddy currents in the material's surface. Flaws and material differences affect these currents, altering the coil's current via mutual induction. Flaw detection relies on measuring electrical changes in the coil, often focusing on voltage changes. Key factors influencing eddy currents include specimen conductivity, magnetic permeability (for ferromagnetic materials), coil-specimen distance, AC frequency, and dimensions. Calibration on test specimens is common, and eddy current testing is highly sensitive to flaws. Equipment ranges from basic meters to advanced computer-programmed systems, with applications including crack detection, component sorting, and metal quality control.

Get in touch with us today