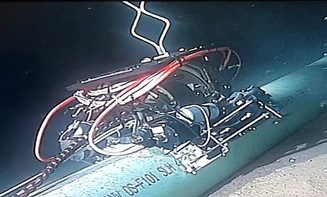
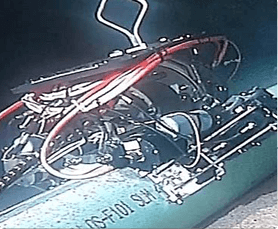
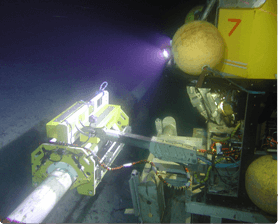
For many pipelines the use of In-Line intelligent pigs is not possible, these are considered to be “unpiggable pipelines”. Furthermore, pipeline operators are increasingly looking for alternative strategies to ILI to allow increased production time and decrease the risks associated with ILI inspections of more challenging pipelines.
Unpiggable Pipelines & ILI Alternatives
For these cases, alternative inspection strategies are required. Identifying suitable inspection techniques and strategies is becoming an increasing concern as a pipeline system starts to show age and in many cases, exceed their design life.
In-Line Inspection Alternative Techniques
When it comes to inspecting unpiggable pipelines, our services provide the best alternative to in-line inspection. Our technology is designed to provide comprehensive and accurate data without the need for in-line inspections. Our services are reliable and efficient, allowing us to inspect pipelines faster and more effectively than traditional methods.
Unpiggable pipeline inspections use advanced x-ray imaging technology to provide a detailed analysis of the interior of the pipe and surrounding area. This provides an accurate gauge of the condition of the pipe and any potential points of corrosion or damage.
Our services also include ultrasonic testing (UT) to supplement the x-ray inspection, providing further information on corrosion rates, wall thickness measurements and other valuable data.
In addition, our technicians are experienced in performing manual inspections using borescopes, where access ports are available, allowing for a more hands-on approach to inspecting walls in areas not reached by x-rays or UT scans.
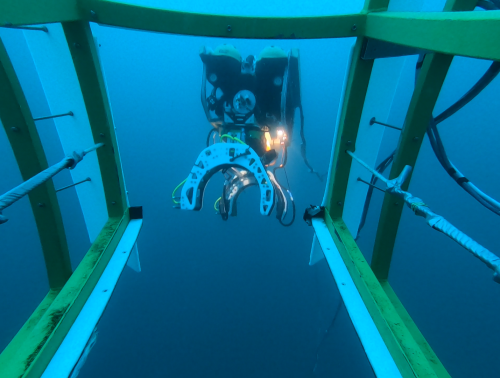
Techniques and Deployment Tools
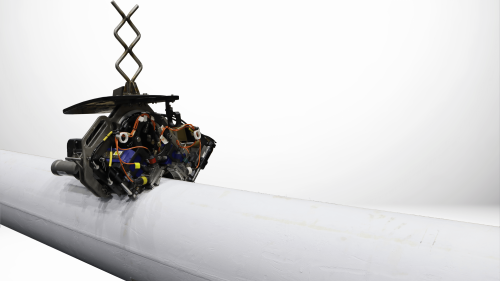
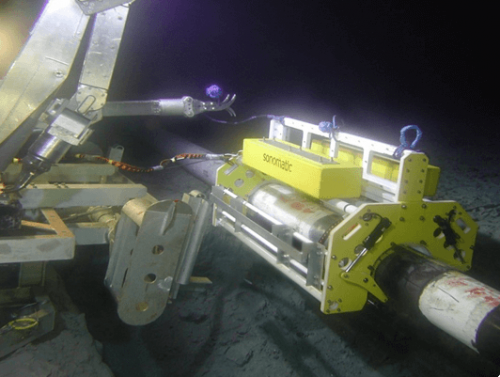
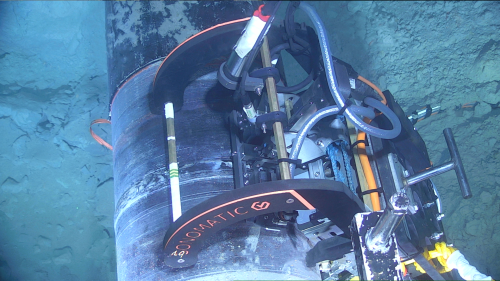
In the case of unpiggable pipelines or alternative strategies to ILI, a variety of techniques and deployment tools are often required. Typically inspection strategies fall into two approaches, an external screening approach covering as high a percentage of the pipeline as possible, or a targeted inspection approach identifying areas most susceptible to defects and applying high-resolution techniques.
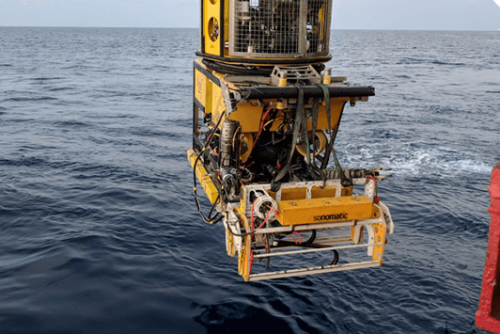
Regardless of the approach taken or inspection requirement, Sonomatic can provide the correct pipeline inspection tool and techniques to fit the requirement. Sonomatic pairs our subsea inspection capability with a depth of NDT knowledge and integrity capability, to assist clients with picking the best strategy and techniques for meeting the requirement on unpiggable pipelines.
Benefits of Unpiggable Pipeline Inspections
Quick and Direct Assessment: Utilising advanced subsea Computed Tomography imaging technology for unpiggable pipeline inspections allows for quick and efficient assessments without having to physically enter the pipe itself or remove sections for inspection. This reduces downtime and costs significantly compared to traditional methods such as manual inspections or even full-scale excavations which can take much longer.
Identify Problem Areas: With ultrasonic testing, we can quickly identify areas that may be prone to corrosion or other issues that could lead to leaks or pipe failure, leading to improved safety and avoiding costly repairs down the line due to preventative maintenance early on.
Ultrasonic testing can also be used to measure the wall thickness of a pipe – as well as the pipe diameter range – helping us identify areas that may need reinforcement or repairs due to corrosion or other wear-and-tear over time. This is an invaluable tool for detecting any anomalies before they become serious issues and helps us prioritize maintenance according to the risk of failure.
Reduce Costs: By combining different methods such as manual inspections with advanced imaging technologies, our technicians can provide a comprehensive overview of what’s going on inside an unpiggable pipeline without having to resort to costly excavation techniques of other existing technologies which can often be inefficient due to their invasive nature.
Non-Destructive: Ultrasonic testing is non-destructive which means you don’t have to worry about damaging pipelines during inspections, reducing the need for costly repairs post-inspection and ensuring our pipelines remain safe and functional at all times. This makes it considered by some to be the most efficient method of inspecting unpiggable pipelines.
Frequently Asked Questions
Automated corrosion mapping involves scanning the pipeline to determine the minimum remaining wall thickness for each position and can be achieved using an advanced automated ultrasonic tool. The systems deployed, produces comprehensive high-quality data that can be displayed in different views to easily identify and/or verify any areas of concern. Sonomatic Inspection Management Software (SIMS) is used to generate 2D and 3D thickness map composites to improve efficiency in data management during the collection phase, and assists in semi-autonomous data analysis and reporting.
Time of Flight Diffraction (TOFD) is a method of accurately sizing and monitoring the through-wall height of in-service flaws. It is effective for weld inspection flaw detection irrespective of the flaw type or orientation. TOFD doesn't rely on the reflectivity of the flaw but uses diffracted sound initiating from the flaw tips. TOFD's main advantage is that it has a through wall height accuracy of +/- 1 mm, and a crack growth monitoring capability of +/- 0.3 mm, on defects of all orientations.
Dynamic Response Spectroscopy (DRS™) is a proprietary technology developed by Sonomatic using frequency-based ultrasonic wall thickness measurements. It is a corrosion mapping technique that applies a broad range of low ultrasonic frequencies (<1 MHz) to penetrate challenging coatings such as composite repairs, PE and Neoprene, and excites the natural frequencies of vibration of the underlying steel. The DRS™ probe raster scans over an area of interest and collects response signals. Advanced signal processing algorithms have been developed to extract the vibration frequencies and map the wall thickness profile.
Pulsed Eddy Current (PEC) is a comparative technique whereby advanced processing of the eddy current signal decay and comparison with a reference signal, allows for the determination of the average wall thickness (AWT). This fast screening method allows for the assessment of the general condition of structural steel and is best suited for general corrosion type defects in subsea pipelines. A major benefit of PEC is its ability to inspect through concrete weight coating, challenging coatings and marine growth.
Angle shear wave methods are widely used in NDT and in most applications the probe is manually manipulated. There are, however, significant benefits to automating the process, both in terms of probe manipulation and data collection. The benefits include the following:
- Consistent performance with minimised human factors effects
- Substantially improved probability of detection (POD)
- Improved sizing capability
- Accurate positional control
- Accurate position information for each scan
- Full recording of all data for more detailed analysis
- Reliable repeat comparisons
Automated shear wave pulse echo is used for a variety of applications, some examples are listed below:
- Inspection of welds to detect and size planar flaws.
- Inspection of corrosion-resistant alloys for stress corrosion cracking.
- Inspection of corrosion-resistant alloys for chloride pitting.
- Inspection of materials in wet H2S service for vertical cracking elements.
EMAT technology is performed from top-of-line and has the capacity to detect internal and external corrosion on subsea pipelines with NWT <15 mm with coating thickness up to 4 mm. The technique does not require direct coupling as the input and received signals are generated by electromagnetic responses. This screening technique provides details of the lateral extent of corrosion with banding to indicate the through-wall severity level.
Multiskip is an ultrasonic rapid screening technique for corrosion and erosion detection on subsea pipelines ≥4” diameter. It uses two transducers mounted on wedges in a pitch-catch to send angled shear wave beams through the pipe wall by skipping multiple times off the ID and OD surfaces. The system is capable of high-speed, high-resolution data collection. For corrosion, loss of signal amplitude, reduction in signal arrival times, and changes to signal shape are used to provide qualitative and quantitative information.
Alternating Current Field Measurement (ACFM) is an electromagnetic technique for the detection and sizing of surface-breaking indications. It works on most metals, does not require direct contact and works through various thicknesses of coatings. ACFM can accurately detect and size linear indications both length and depth. It is also easier to use on complex geometries such as nodes and nozzles.
A phased array is a unique ultrasonic probe consisting of a group of transmitters or receivers, allowing for precise control of sound waves. When used as a transmitter, the timing of element activation creates interference that can shape and angle the beam. As a receiver, the time differences between pulse arrivals at each element provide information about the pulse source's location. Similar to how our ears work, phased arrays can pinpoint sound directions. Unlike traditional twin-crystal probes, phased arrays adjust signal phases for desired beam angles. However, their performance relies on the number, size, and spacing of elements, requiring specialised signal processing equipment. Phased arrays are widely used in radar, sonar, and medical applications but face challenges in NDT ultrasonics due to metal penetration and wave mode issues.
Ultrasonic testing utilises sound waves to detect corrosion within materials. This NDT technique utilises array transducers that pulse elements in a sequence called phasing.
Eddy Current Testing (ET) is used to measure the intensity of electrical currents in a magnetic field. Eddy current testing utilises AC current in a coil near or around a specimen, inducing circulating eddy currents in the material's surface. Flaws and material differences affect these currents, altering the coil's current via mutual induction. Flaw detection relies on measuring electrical changes in the coil, often focusing on voltage changes. Key factors influencing eddy currents include specimen conductivity, magnetic permeability (for ferromagnetic materials), coil-specimen distance, AC frequency, and dimensions. Calibration on test specimens is common, and eddy current testing is highly sensitive to flaws. Equipment ranges from basic meters to advanced computer-programmed systems, with applications including crack detection, component sorting, and metal quality control.